When do I use it?
Suppose you need to change the scenes during your live show or a class (i.e. you decided to set up a Chroma key, change the color scheme, add text or an extra webcam to your broadcast, etc), but you don’t want to interrupt your stream or get your audience distracted while you are making adjustments. This is exactly when ManyCam’s preview mode comes into play to keep your show looking professional – it allows you to prepare a new preset offhand from scratch without anyone even noticing. Once your new preset is all set and ready, you can safely transition to it thus entirely changing your broadcast in an instant.
What happens when I edit an active preset during my live show?
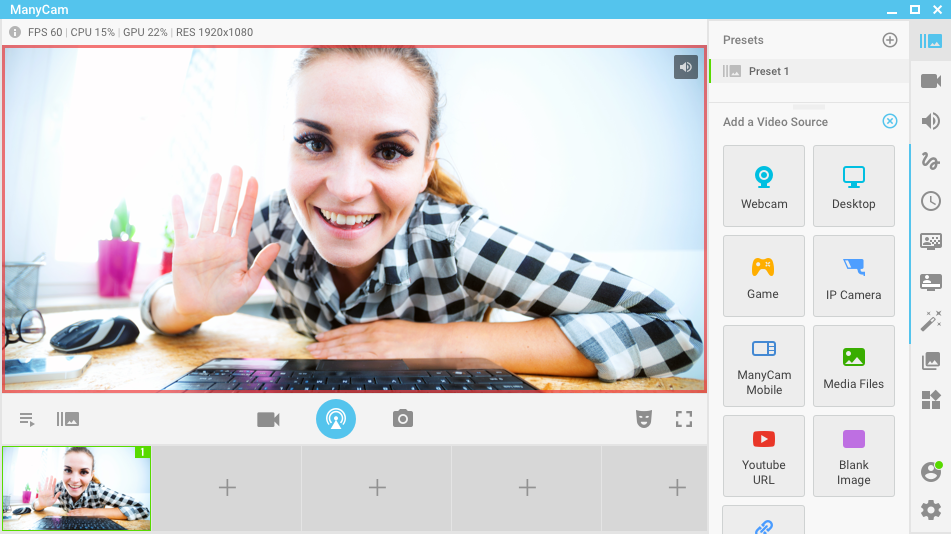
ManyCam’s Main Live window shows everything that’s happening in you active preset. You can tell which preset is active by the color of the preset number in the upper right corner – green means it’s active, grey – inactive, orange – inactive preset that you are currently editing. The contents of the ManyCam Main Live window is being displayed live in an application or a platform you are streaming from and is instantly visible to your audience or a person on the other end (whether it’s an app/website where ManyCam Virtual Webcam is selected as a video source or a streaming platform you are connected to through RTMP). When you edit an active preset during your live broadcast, your audience will immediately see any changes you make, so it’s always better to edit an inactive preset instead and then safely switch to it once you are done with the preparations.
How do I edit inactive preset?
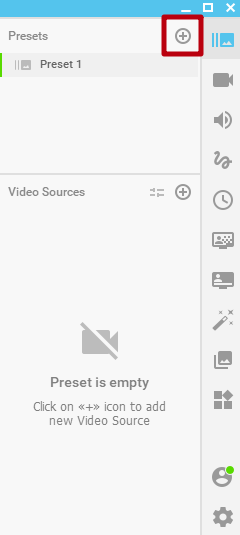
To start editing a new preset, you need to create one first. Click on the “+” icon to create a new preset.
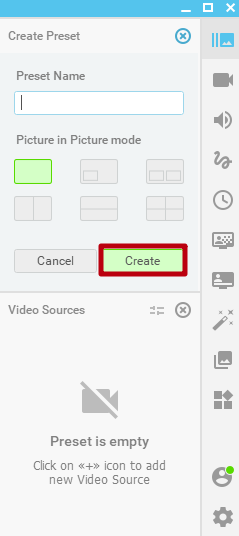
In the opened settings box, you can set a custom name for a new preset (optional) and pick the Picture-in-Picture option if needed. Click “Create” to proceed.
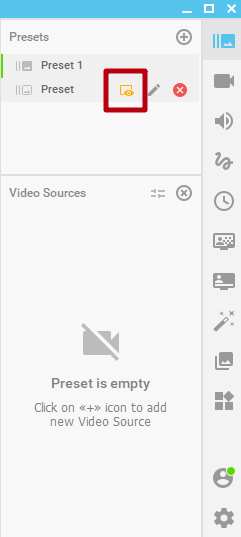
Now, when the new preset is created, you can start editing it by pressing on the “Preview” icon as shown below.
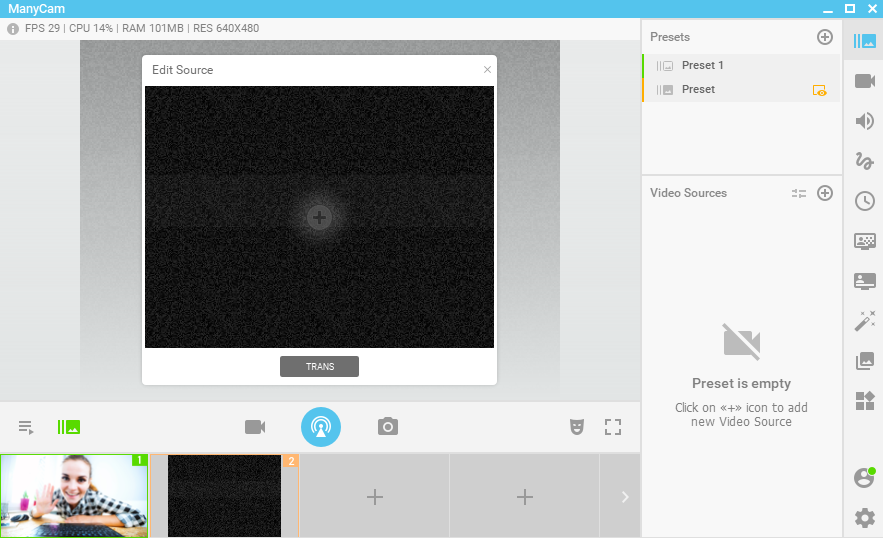
The “Edit Source” window that appears shows the video output of an inactive preset. While in the editing mode, the preset’s video feed is not being streamed anywhere and is only visible to you. You can take your time and customize the preset the way you want by changing the video settings, adjusting the image properties, applying effects before you decide to go live with it. Once you are done setting it up, push TRANS to transition and make the new preset visible to your audience or a person on the other end.
Note. For a similar purpose, you can also edit any existing incative preset. So, if you already have several presets, there’s no need to create a new one – you can always revisit any preset you see on the list and safely edit it.