The ManyCam Virtual Webcam Extension is a new, improved virtual camera technology designed specifically for macOS. The new virtual camera offers more security and is supported by a wider range of applications, including Safari and Photo Booth.
The new camera is listed as ‘ManyCam Virtual Webcam Extension’, and is installed alongside the regular ‘ManyCam Virtual Webcam’, which will also remain available in the system, allowing you to use both virtual webcams simultaneously.
Installation
- Install the ManyCam application and run it.
- At first launch, you will see a popup dialog notifying that the system extension was blocked. To enable the extension, click Open Security Preferences.

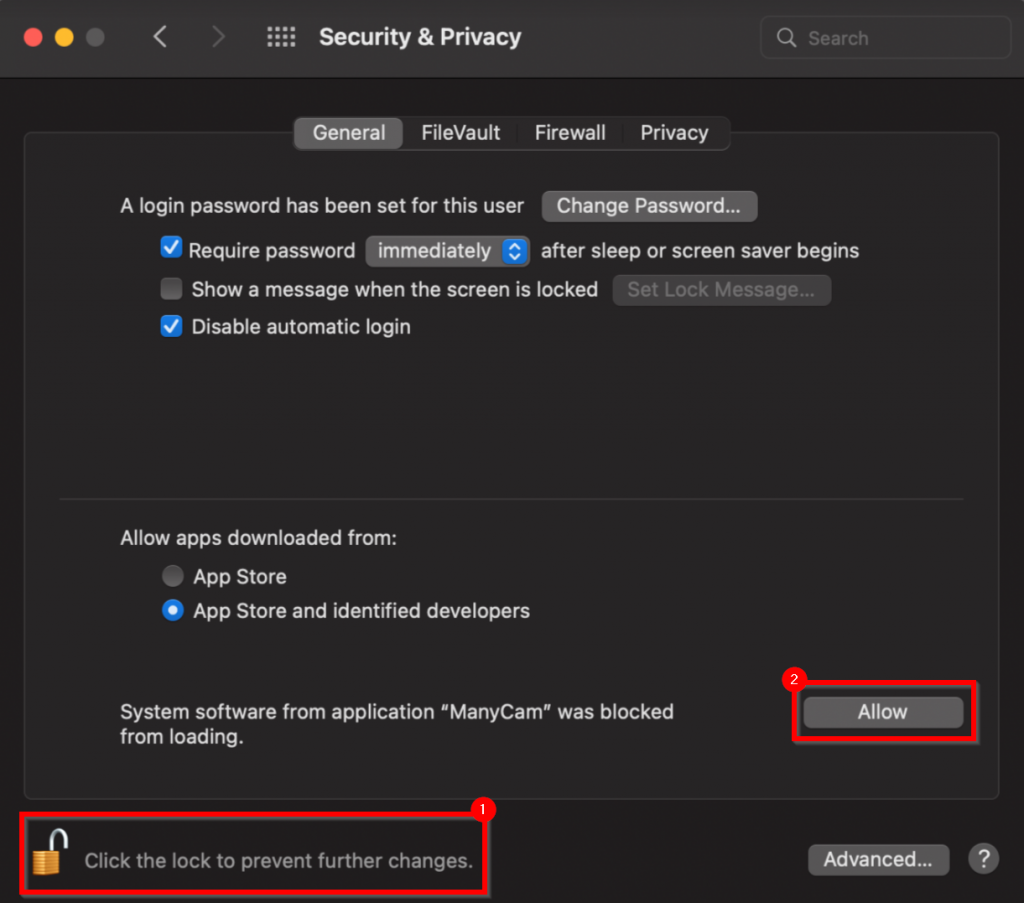
3. If you run macOS 12, click on the Lock icon and then press Allow:
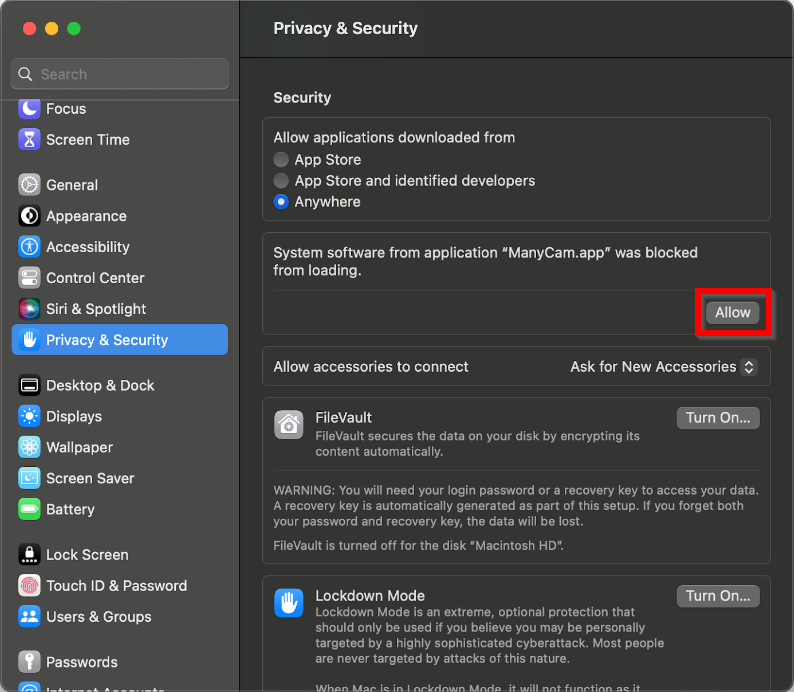
If you run macOS 13, you will need to click Allow as shown in the image below:
Once completed, the new ‘ManyCam Virtual Webcam Extension’ virtual camera will become available as a video source option system-wide. To start using it, simply choose it as a video source within the application that you’d like to connect ManyCam with.
Uninstallation
To uninstall the virtual webcam extension, run Uninstall ManyCam.app, make sure to grant the permissions required during the uninstallation process. Once done, restart the machine.
If the camera extension remains in the system after you’ve completed the uninstallation process, re-install ManyCam from this page, and run the following command in terminal:
/Applications/ManyCam/ManyCam.app/Contents/MacOS/ManyCam --deactivateCamExt
Once done, restart the machine and check if the extension was removed.
If uninstalling ManyCam came out unsuccessful, try emptying the trash on your device and try again.