Resolution – allows you to choose the output video resolution.
When a specific resolution is set, ManyCam will forcibly offer that resolution to the video application. If the application doesn’t accept video in the resolution selected, ManyCam will switch to an acceptable resolution not larger than the one you have chosen.
Frames per second (FPS) – or the frame rate. It is the frequency (rate) at which consecutive images called frames are displayed in ManyCam.
ManyCam Live Window
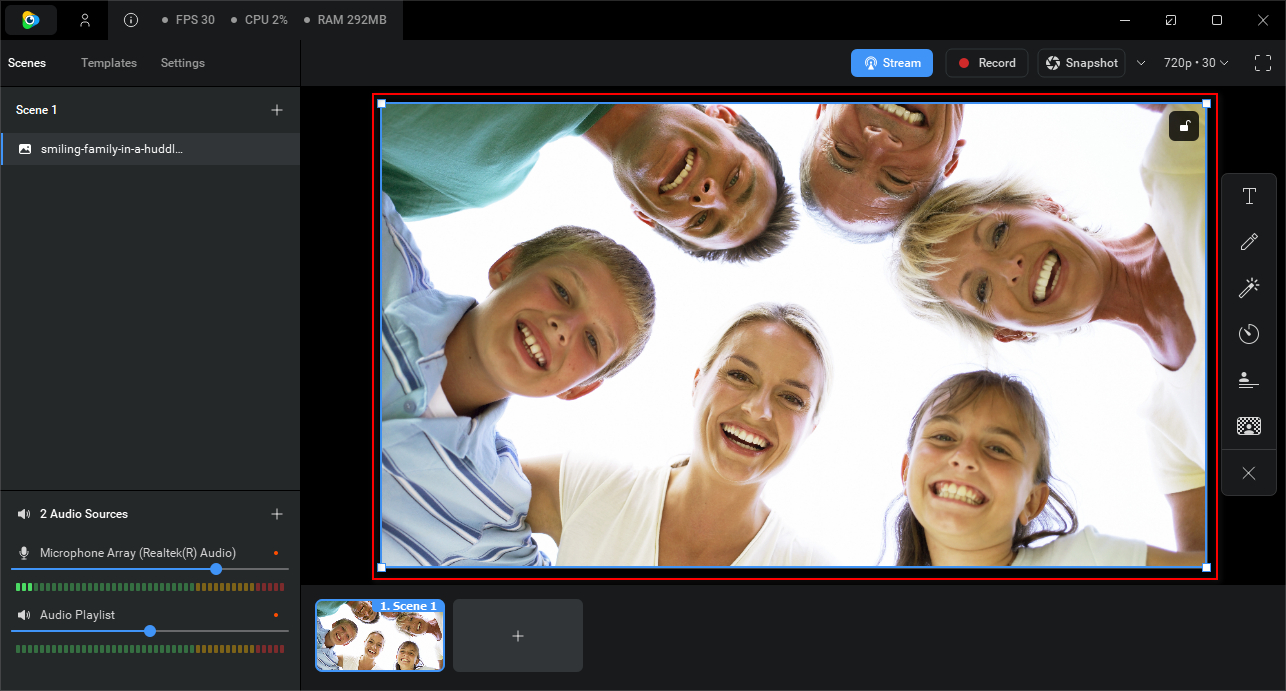
The Main Live window is the largest window, which shows the output picture with all of the currently chosen effects and settings applied. The output image you see in the main live window is being transmitted to the application where ManyCam Virtual Webcam is selected as a video source. By clicking on the Main Live window, you can choose the output image: your web cameras, game, IP cameras, your desktop area, media files, YouTube videos, cameras of your mobile devices or some blank images.
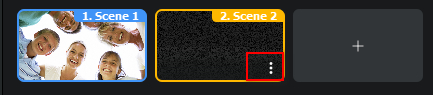
There are small windows located under the main live window – they are called video presets. You can customize any unlocked preset using different settings and features of ManyCam. By clicking on the small window with “+” sign, you will add a new preset window.
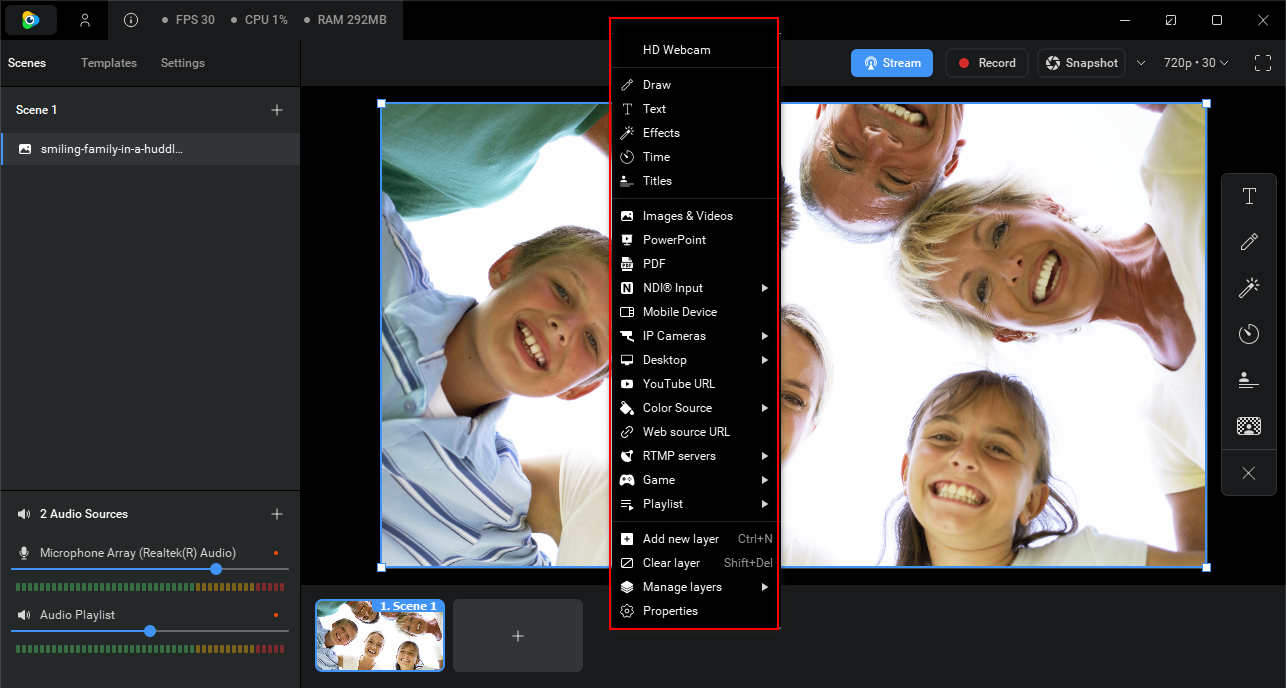
By right-clicking on an unlocked preset you open a list of available sources.
The output image you see in the Main Live window is transmitted to the application where ManyCam Virtual Webcam is selected as a video source. ManyCam displays the content of the active video preset. You can tell which preset is active by the color of the preset number in the upper right corner – blue means it’s active, yellow means it’s inactive.
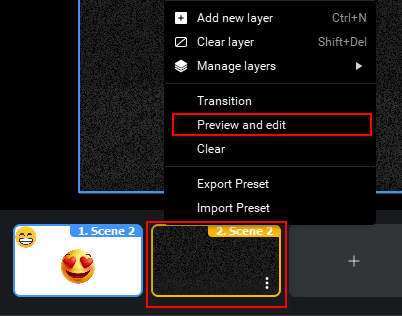
To preview an inactive preset before streaming, left-click in the inactive preset and select “Preview and edit”. While in the “Preview and edit” mode, this preset’s video is not being streamed anywhere and is available only to the person editing the preset. You can customize the preset by changing the video settings, adjusting the image properties, applying effects before you go live with it. Once you are done setting it up, push TRANS to switch to the preset you have prepared. Learn more about the Preview mode here.
Transition
![]()
Switch between presets with TRANS and CUT buttons.
TRANS – custom transition effect
CUT – abrupt transition
You can change the type and duration of the Trans effect. Right-click on an inactive preset and select “Transition” from the drop-down list to access Transition settings. The settings you choose will be applied to all presets.
Presets
Here you can manage your presets: add, replace, edit video sources: create, clear, and remove presets; set transition rules and preview presets before switching to them.
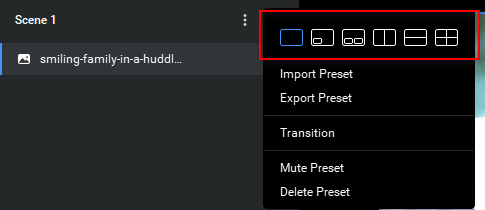
Presets settings can be accessed from the Scene menu at the left side and from the small windows under the main live window.
To create a new preset, click on the vertical 3 dots sign as shown below.

You’ll be prompted to select the Picture-in-Picture mode:
When you add more presets and layers, they will be displayed under SCENE:
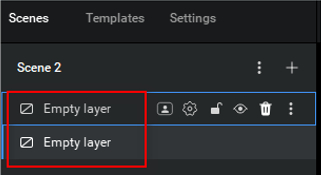
The video sources of a selected layer will be displayed below, under SCENE:
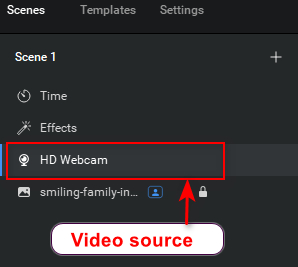
Here you can add or remove video sources from a layer. When you have more than one video source on a layer, video sources act like Video Playlist items. Clicking on “Properties” of the video source will lead to Layer Settings where you can zoom, rotate and add color to the video source.
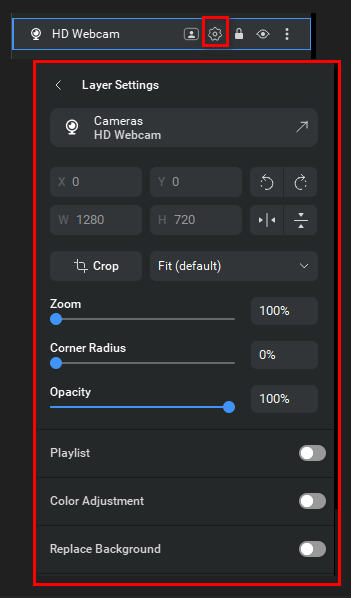
Layers Settings
Zoom – Use the zoom slider to set the zoom level. When the image is zoomed you can move the image with the cursor to see its fragments.
Flip & Rotate – allows you to flip the image vertically or horizontally and rotate it.
Color – You can change brightness, contrast, saturation and color levels of the picture (RGB).
Tips
- To achieve a black-and-white image, move the saturation slider to the left.
- To set the color option to the default value click on its icon.
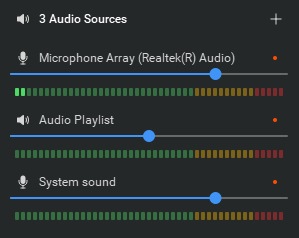
Audio Sources
Audio sources section is located at the bottom of SCENE panel.
Audio sources has microphone, audio playlist and system sound settings.
This tab contains several widgets that allow you to configure your stream’s audio settings. Learn more about Audio Settings here.
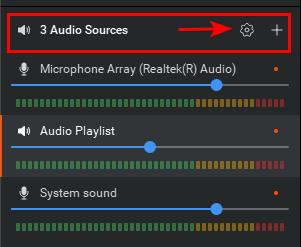
Audio Sources
Clicking on gear icon in Audio Sources will lead to Audio Settings. Here you have access to Audio playback device and audio monitoring sections.
Audio Playback Device – Here you can add/remove/mute audio devices, control their volume, and apply Equalizer presets to them.
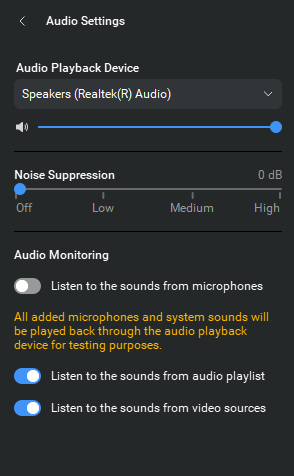
Playback devices can be selected from the list of available devices by clicking on the currently selected device in the Audio Playback Device list.
You can enable and control the level of Noise Suppression to clear your stream’s audio feed off of any background noise.
Audio Monitoring – allows you to channel the ManyCam’s audio input feed through the selected audio playback device to test the signal coming from your microphones.
Microphones
Here you can add/remove/mute audio devices, control their volume, and apply Equalizer presets to them.
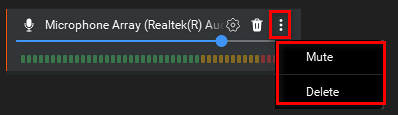
You can view the list of all microphones in the system. You can pick any device from the list to set it as ManyCam’s audio input. This also includes the “System sound” microphone option. This microphone captures all the sounds produced by your system, including all applications.
With ManyCam you can use your microphone as an audio capture source for many applications and websites. You can apply various sound effects (Equalizer presets) to your audio output.
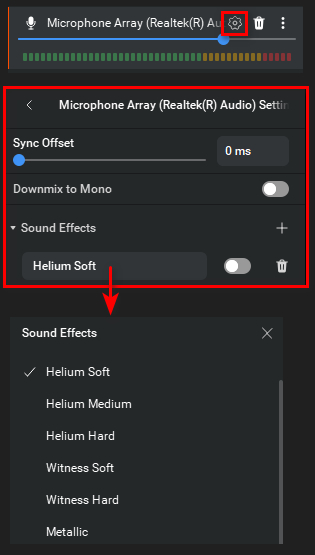
Sync Offset – is a feature that allows you to set a custom delay for your microphone (audio feed) in case your video and audio are out of sync.
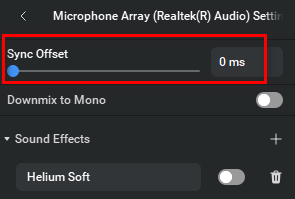
You might need to experiment with this setting to find the correct value. Make sure that your microphone is added as an Audio Input device, otherwise, Sync Offset will not be available. The default step size of the delay correction is 10 ms. Holding down the CTRL key while adjusting the delay will increase the step size to 100 ms.
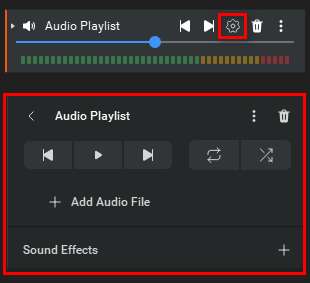
Audio Playlist
Audio Playlist allows making a playlist consisting of multiple audio sources.
You can Add or Remove songs from the playlist, Load/Save your playlists.

System sound
System sound option allows you to mute all ManyCam sounds at once.
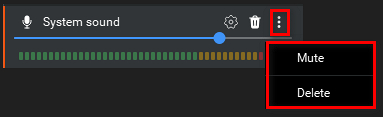
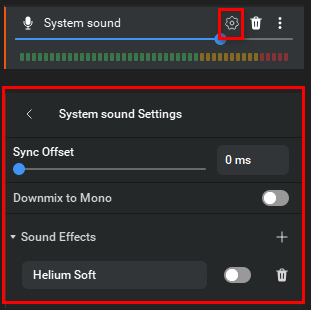
System sound has also a sound effect and sync offset that applies to all ManyCam sounds.
Sync Offset – is a feature that allows you to set a custom delay for your audio feed in case your video and audio are out of sync.
Chroma Key
Here you can apply the Chroma Key feature to remove the selected color/background (green screen) from your video stream.
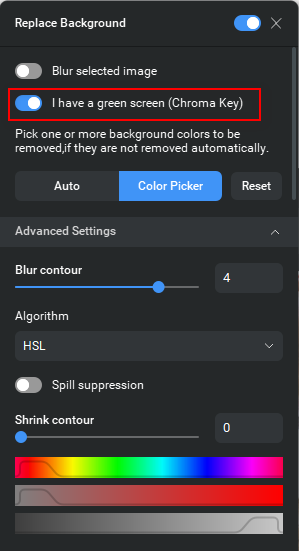
Chroma key compositing is a special effects technique for compositing (layering) two images or video streams together based on color hues (Chroma range). The technique has been used heavily in many fields to remove a background from the subject of a photo or video – particularly in newscasting, motion picture, and video game industries.
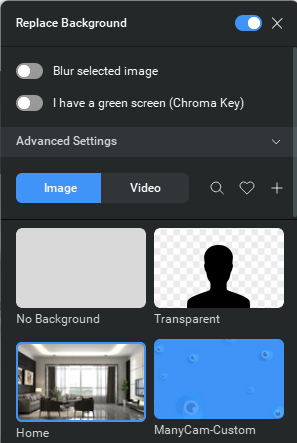
Virtual Background
Here you can select Transparent background, Blur an image or a video file from the ManyCam collection, or any custom image or video of your choice.
Virtual Background general Guide
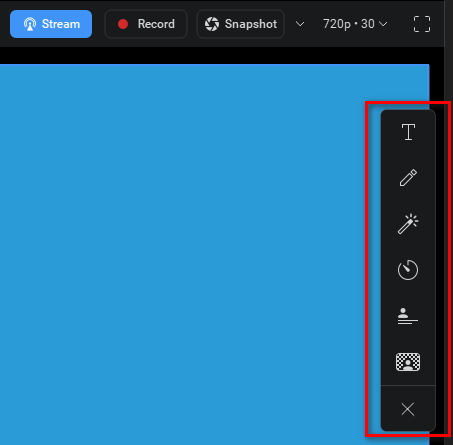
Realtime Toolbar
There are 6 shortcuts in ManyCam Realtime Toolbar: Text / Draw / Effects / Time / Title / Virtual Background.
Text
In this tab, you can impose your text over the video stream.
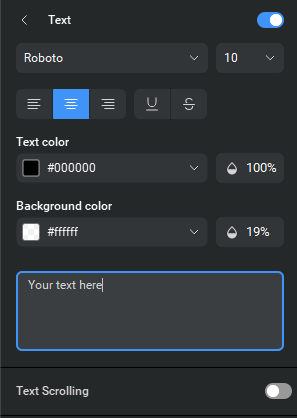
In the text feature, type the text you would like to be shown in the field of the Text Tab and tick “Enable text”. The text will be instantly displayed over the Main Live window.
You can apply various options to the text and place it everywhere you like in the video window. You can choose horizontal and vertical scrolling of the text, set the speed of scrolling and change your text appearance: font color, style, size and effects, background color and opacity. You can drag and drop the text around your video window to choose the place where it will be shown.
Draw
In this tab, you can draw over your video.
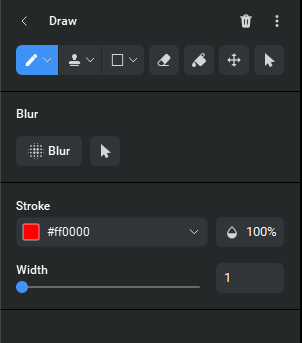
Here you can draw over your video choosing a pen, fill or eraser.
You can choose any color for your drawings and change pen thickness, saturation and transparency.
Time
Here you can impose the current date and/or time over your video or picture.
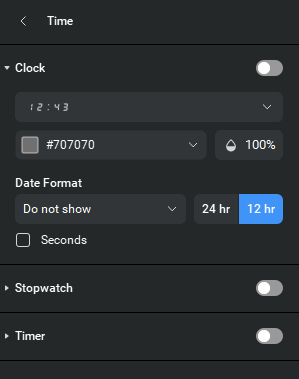
In the Options menu, you can select a 12-hour or a 24-hour format for your clock.
In addition, you can select a date format or select “Do not show” to show time only.
To resize the clock, select the time object once it is added in the preset and use the mouse to adjust the size.
There are clock, stopwatch, and timer options available on the Time tab. You can drag and drop the clock around your Main Live window to choose where it will be shown.
Title
Add a level of professionalism to your video productions with the ManyCam Title feature. Highlight important news, add your name, location, or other information to your broadcast. You can impose a title over the video stream and add your own text in place of the default one.
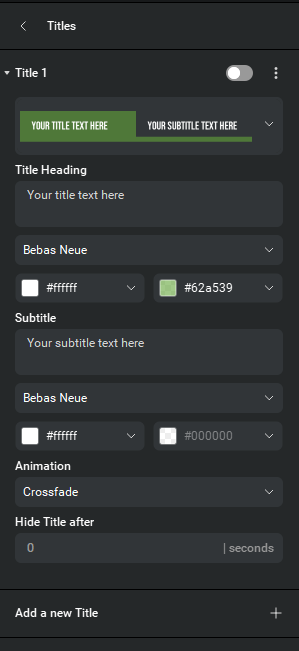
Click the ON button to activate or deactivate Title on your live video window.
A selection of title is available by default. Left-click on a Title to see the full list.
You can add as many Title as you like by clicking on “Add New Title” button. In case you want to remove a Title you created previously, select “Remove” from the option next to the title. You can add and edit the title heading and subtitle.
Effects
This section allows you to choose various video effects you want to apply to your stream. Learn more about Effects here.
The chosen effect appears in the current output picture and on the Selected list.
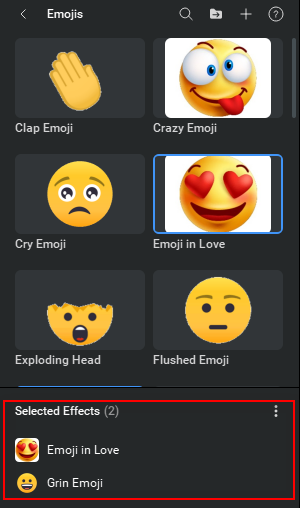
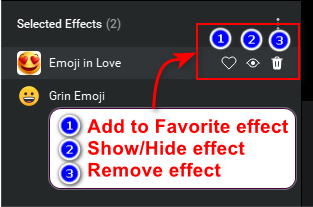
Selected Effects – a list of currently selected effects. You can also save chosen effects as presets for easy access. Select effects you like, click on the right top of the Selected window and choose “Save as preset”. Your preset will be saved into Groups folder at the bottom of the list.
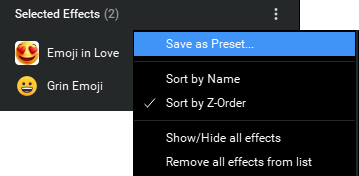
This setting also allows to show or hide all applied effects and remove them from the list.
You can apply different effects to your stream by clicking on them and remove chosen effects by clicking on the cross sign next to the effect’s name on the Selected Effects list. There is also an eye icon to the left of the selected effect, which allows hiding the effect temporarily from the video feed.
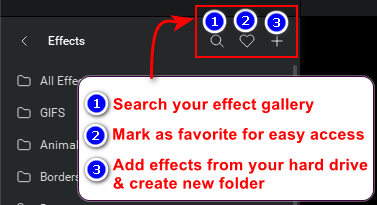
You can also search for effects within the ManyCam’s effects library, add new effects, and create new Effect folders (categories).
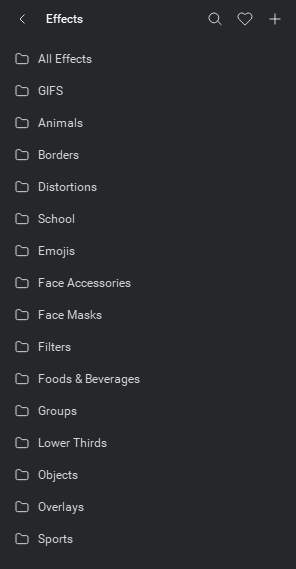
ManyCam effects are divided into the following categories:
GIFS – animated effects made out of GIF files. You can make your own by dragging & dropping GIFs into ManyCam.
Animals – a collection of animals to enhance your video.
Borders – fun and cool frames around your photos or video output.
Distortions – various perspective distortions you can apply to your picture.
School – a category of effects for online classes.
Emojis – various funny pictures of smiles you can impose anywhere on your video.
Face Accessories – various effects that ManyCam can impose over your face using a built-in face detection function.
Face Masks – 3D Face Masks that wrap around your face through facial recognition technology.
Filters – a set of filters to modify your picture.
Food & Beverages – a delightful assortment of food and drinks to enhance your video.
Groups category contains all saved presets with chosen effects.
Lower thirds – a graphic overlay placed in the title-safe lower area of the screen.
Objects – various funny pictures you can impose anywhere on your video.
Overlays – full-size images to set wallpapers as your video output.
Sports – a collection of sports scenes to power up your visuals.
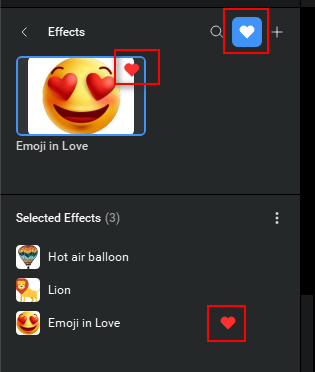
Favorites section contains a list of effects you mark as favorite for easy access. Click on the tiny heart icon to add an effect to favorites. Once you mark an effect as favorite, it will immediately appear in the Favorites section.